Be sure to use the bin with your most recent filmscribe sequence. It is VERY IMPORTANT you use the exact same sequence for your .EDL, otherwise your scans won't line up.
One tip I found to work well is trashing the EDL manager prefs (at the finder level) before starting the application. I was having issues getting sequences to load, but after trashing the prefs it all seemed to work ok.
Launch the EDL manager program or, from the Avid, choose Output>EDL. Similar to FilmScribe, the interface will open. From within EDL manager choose File>Open and navigate to the FilmScribe bin with your prepped timeline (see earlier post for prepping info). The sequence will load into the EDL manager and create a list which can be saved out, zipped and emailed to the DI conforming house.
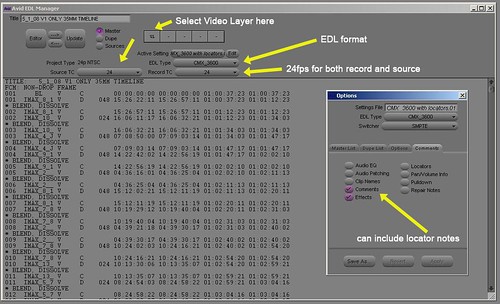
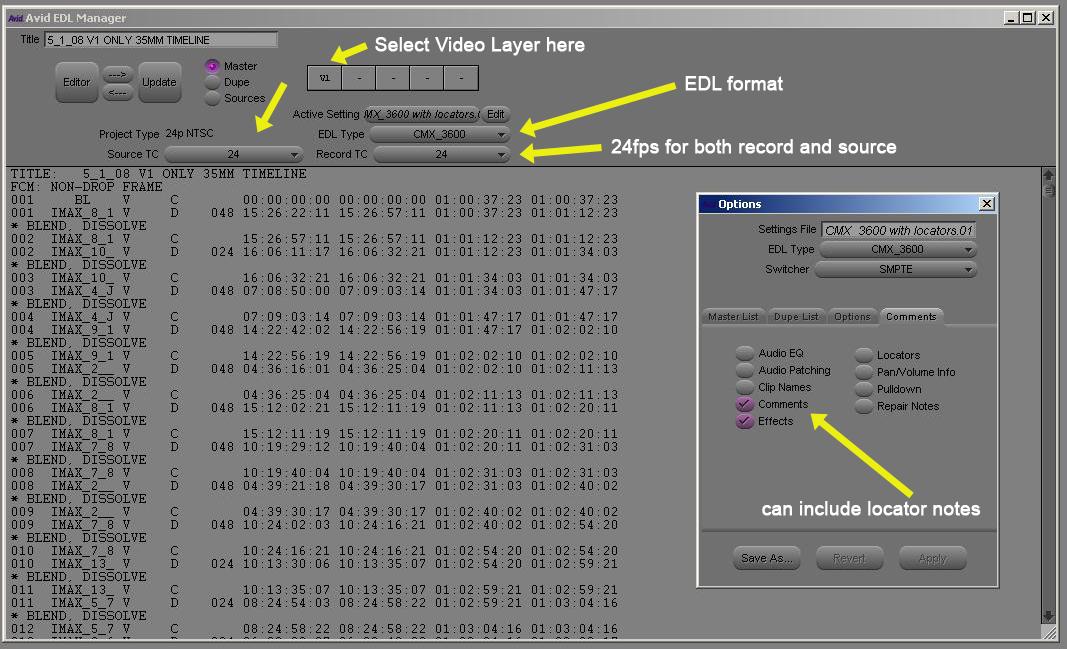
EDL formatting is important. Most houses that I have worked with request CMX3600 EDLs with record and source TC24. They also will request each video layer as a separate EDL. If you have two video layers (V2 with titles for example) you will need to create a separate EDL for each video layer. I have created a picture that highlights the settings. Keep in mind that EDLs are essentially cuts and dissolves, so if you have a bunch of Avid EFX happening the conform house will need to reference your QuickTime movie to see what's going on.
Full Size
I have heard that if you still are having EDL errors after trashing the prefs and moving everything onto one video layer you might try decomposing (deselect offline media box) your EDL timeline so new clips are created. Yes, all the clips will be offline but it does not matter because we are only concerned with the metadata. This goes without saying but DON'T DECOMPOSE YOUR MASTER TIMELINE, just the prepped copy of that you created for FilmScribe / EDL manager.
No comments:
Post a Comment